
By Wood-Mizer, USA
February 24, 2023
Do you need to know how to tension sawmill blades on your Wood-Mizer LT15, LT28, LT35, or LT70 portable sawmill? Here is step by step instructions on how to do so.
How to Tension Sawmill Blades for Wood-Mizer LT15, LT28, and LT35 Portable Sawmills:
1. This process will be the same for tensioning the blade on Wood-Mizer LT15, LT28, and LT35 portable sawmills. Start by making sure your throw handle is pointing towards the ground when putting the blade on to ensure that all the tension is off the blade.

2. Once the sawmill blade is installed, move the throw handle over, so that it is pointing up, and the handle is tight and locked in.
3. Once you have moved your throw handle up, if it is not tight, this indicates that there is not enough blade tension and you will need to increase the blade tension.
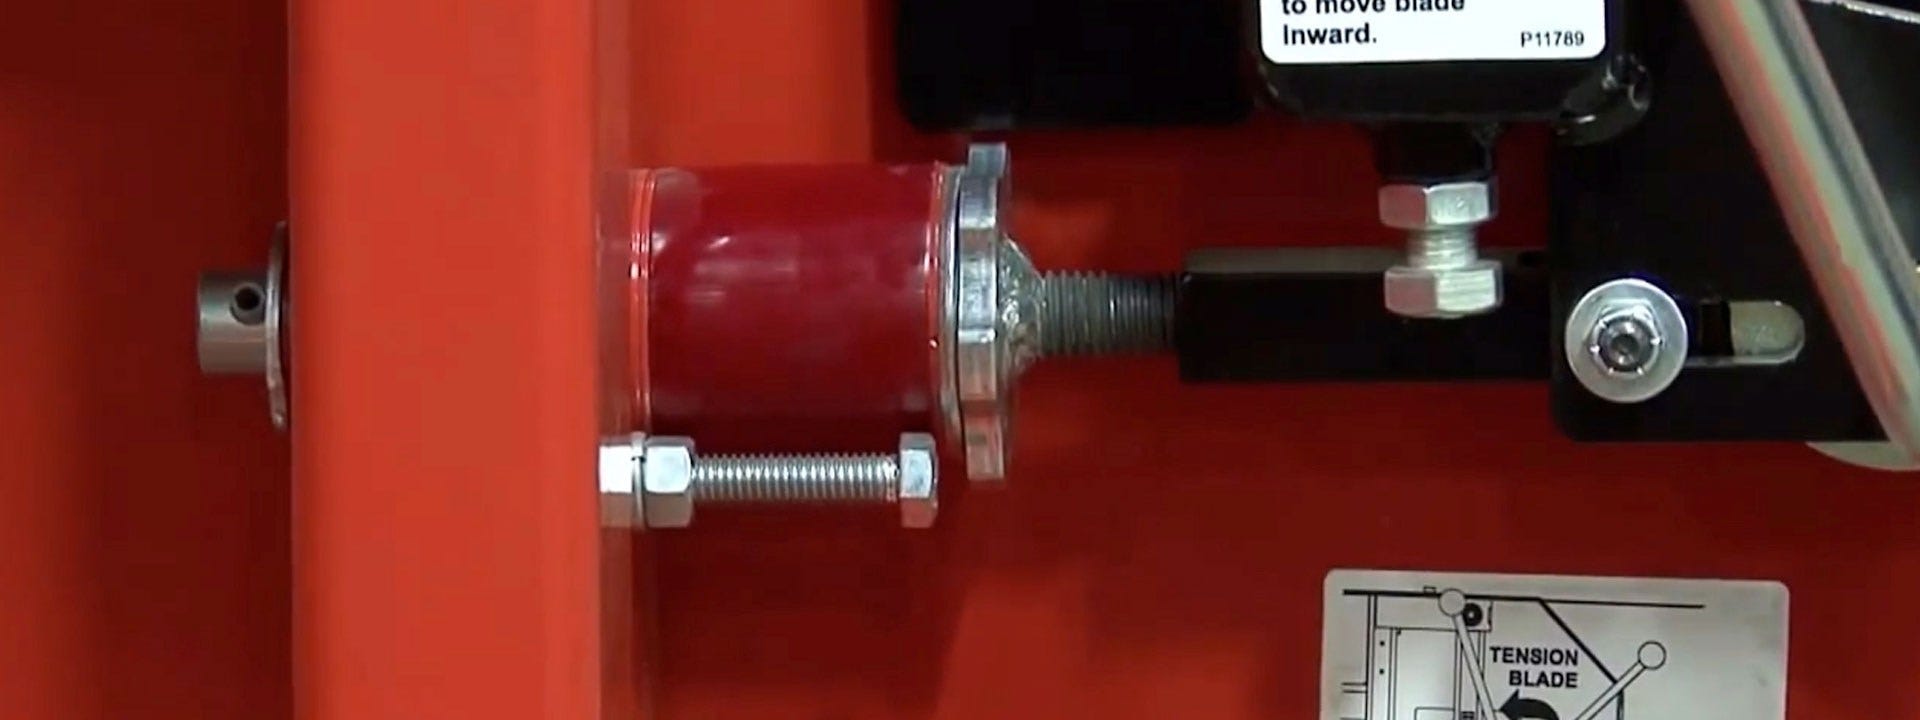
Another way to tell if your sawmill blade is not at the proper tension is if the bolt to the left of your throw handle is not in line with the orange washer on the turn handle.

4. To fix this, move the throw handle back down, and spin the turn handle which lies above the bolt.
5. Continue to thread this out until it has reached the correct tension. You will feel the handle tighten each time as it grows closer to the correct tension.
You will know it has reached the correct tension when the head of the bolt is in line with the orange washer on the turn handle when the throw handle is pointing up, meaning that it is properly tensioned.

There is also a small diagram on the sawmill itself if you need more information than the video and written instructions.
If you have any questions about tensioning your sawmill blade, please contact Wood-Mizer.
How to Tension Sawmill Blades for Wood-Mizer LT70 Portable Sawmills:
1. This is the process for tensioning blades on a Wood-Mize LT70 portable sawmill. Before you start tensioning the blade you will need to make sure you have the proper pressure in your air bag.

You can do this by examining the airbag gauge. There is a sticker on your sawmill that will tell you what you air bag should be set to depending on your blade. Note that this must be done before tensioning your blade.
2. If your airbag is not at the proper pressure there is a valve on the side of the bag in which you can add air.

3. Once you have made sure you have the proper pressure in your air bag, open the valve all the way up, pull up the lever and pump the handle until the gauge shows that it is at the proper poundage.


4. Then close the valve and release the pressure off the hydraulic pump.
Make sure to check the correct pressure and poundage by using the information on your sawmill’s sticker.

Please contact Wood-Mizer if you have any questions!